
Pre – Ramble – I Mean Amble.
As is common to most artists, I enjoy experimenting with various art media. In recent years I’ve investigated drawing on the iPad screen. Rather than use a stylus, I draw with my fingertip on the screen.
With this new media I draw much as I always have – rendering with my hand (and heart) the everyday world. This type of drawing still requires me to use the traditional drawing, and compositional skills I’ve learnt over many years.
To give my iPad drawings and paintings a physical home, it is of course necessary to print them. In this way they are akin to photographic images. It was important to me, to bring them into the world myself; and I explored how best to go about it.
I share here – and in some blog posts – my: explorations, research, thoughts and experiences in: printing my iPad artworks, and also making “reproductive” prints of my art in traditional media: watercolour, ink pen, pencil, acrylic…. With a close look into the field of inkjet/digital/giclee printing. *I plan to have art prints for sale in my ”Shop” soon.
The iPad (with a keyboard attached) has become an invaluable tool for many of my creative ventures. I also built this website on it – I rarely use a computer for anything! (Yes, I know an iPad is a type of computer – but one that allows for me an amazing amount of artistic flexibility and innovation.)
To get my art images ready for print I don’t use Photoshop, or ICC profiles, instead, I found simple ways to do this with my iPad, using: various apps, including art apps, and the editing tools in the “Photo” section on the iPad. And with the use of pigment inkjet inks, and acid free, or 100% cotton paper, I’m now able to make high quality, fade resistant art prints.
Learning these new skills continues to be an exciting part of my creative journey.
Points I Look At.
- Differences between iPad art “original” prints, and “reproduction“ prints.
-
About digital/inkjet (giclee) printing – with links about “open” and “limited” print editions.
-
About the inkjet prints I produce myself: the printer, processes, and paper media I use.
-
Art for all
I’m learning as I go along… I do recommend you read the (pretty green) links I’ve
 Laser prints.
sprinkled throughout this page, as they expand on some of the points I make. *Some are links to other websites. I don’t necessarily agree with all their viewpoints.
I’ll keep this page updated with any info and links I find helpful; and hope it will also be a help to you.
A Little More Ambling…
Over the years I’ve often used a colour copier/printer to scan, and make “reproduction” prints of my watercolours, ink pen, and pencil works. These were mostly used to illustrate my poems, for my hand made books.
I generally preferred to work (still do) in a small size, A3/A4 and under; a good size for printing, and my art and writing projects could fit nicely on a “stable” table – which at the time, served as my studio space! It perched easily on my lap – that’s if a child wasn’t there already, and I could quickly put my work up high, away from small hands when necessary – which was often!
Though I always made sure they had their own art and writing materials to use.
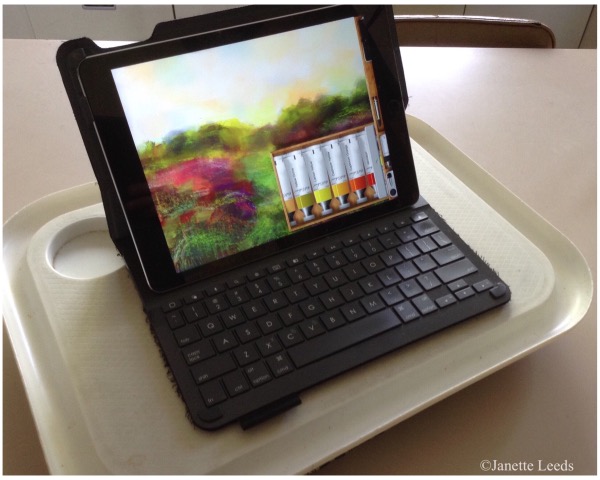 A “stable table” with my iPad Air 2 on it.
Sometimes, I’d play about with a print: adding a top coat of an acrylic gel medium, some times I’d add a tint to the gel, and when it dried, I’d add a little more watercolour mixed with the acrylic gel, and so on..
 A copy of one of my watercolours, with coating of tinted gel medium.
These days I have more time and space for my art and words. Primarily I still work in relatively small size formats – with some larger, usually canvas works thrown in occasionally. The size of an iPad screen quite suits my purposes. *I share more about apps I use, on my page, “Some App Information”.
I began with an iPad mini, moved onto an iPad Air 2, used an iPad Pro 10.5 for 6 or so yrs – all of them were great to use – now I use the latest iPad Air (2025)
I find having a keyboard attached to the iPad, is vital in making most of what I do a lot easier.
A fellow blogger, Paul Longo, certainly does some wonderful work on his iPad Pro, you can see some of it at his blog, “portfoliolongo”.
I still frequently use my “stable” table, and I still like to make “reproduction” prints of some of my work in traditional art media. I’ve now replaced the old copier with a good quality inkjet printer – I share more details about these areas in section 3.
For a while I used an app called “Scanner Pro” to bring my traditional artwork into the iPad, now, I usually just take a photo with the iPad camera.
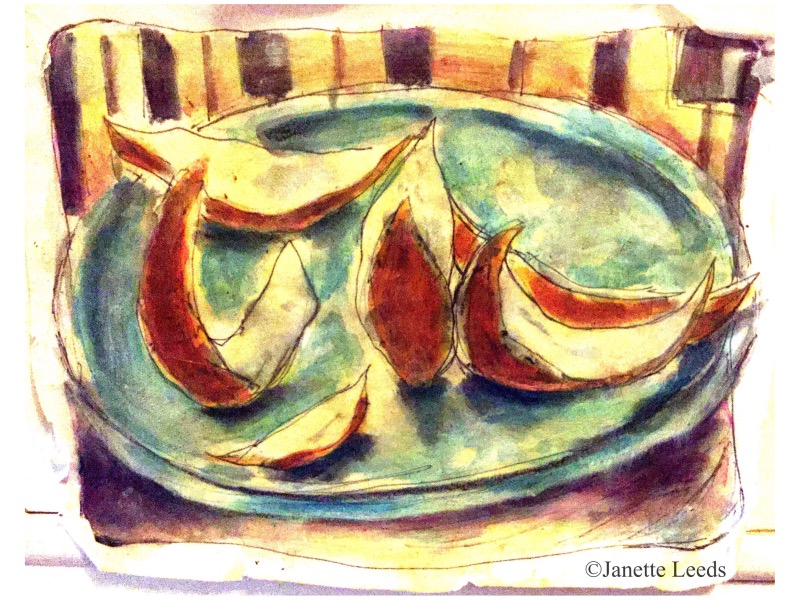
 Watercolour on paper, and some art app media. This has since, been printed onto A4 Canson 220 paper. I was pleased how the texture showed through.
I use the photo section on the iPad to do any adjustments and edits to an image: saturation, cropping, contrast, brightness and so on… The paper I choose to print on directly impacts on these decisions – as different paper colours/whites and textural surfaces, vary in how they take up the ink, and therefore effect the final look of the image.
I continually do small “proof” prints to see the changes that I may be need make, to get the final desired result. In this way, you also learn the variations of the how the iPad screen image looks, and how it will translate to the actual print. This requires a bit of practice; I find it quite enjoyable! *It’s common for an image to need editing to produce a good quality print; more info further along.
Before printing I often send my image to the “Pages” app on my iPad, to put a border around it, and from there to my inkjet printer.
In 2025 I plan to have some of my original art and prints available in my “Shop”. I select some of my art for my Red Bubble shop; mostly of a more pattern and illustrative style – which suits the items (and fine art prints, and poster prints etc) I have available there. I’ve also enjoyed using the shop for producing items for gifts for friends, or for myself. 🙂 Also you can print an artwork for your own private purchase, and not necessarily have it available in your online shop.
I also use my Red Bubble shop occasionally for very large prints – I can print up to about A3 size on my own printer. There’s an example of one of my artworks as a large poster print, that bought for myself, on this post here.
*This is a cropped section of my watercolour on paper. After I scanned it in, and cropped it, I added a little more ink pen and wash, using the media in Procreate – which you can see here in this video. It turned out well on the prints I made of it. I used the “Vont” app to add words to the video.
1/ Differences Between iPad art “Original” Prints, and “Reproduction” Prints.
I’ve continually printed, in one way or another, some of my iPad artworks since starting out on this adventure.
The art I draw on my iPad, and then print, is an “original print”; not a “reproduction” – a print of a work in another medium. *More on this in the next section. Not that each print is a unique, one of a kind, as in a “mono print”. But that each iPad artwork I choose to print, is only fully realised as a finished work, when it takes it’s home in print form.
Sometimes my iPad art has a “reproductive” component, where I scan/take a photo of the beginnings of a drawing or painting on paper or canvas; then hand draw on it further in an art app, before printing it.
At times, I also add traditional media to prints of my iPad art – a little more on this further along in section 3. *Some examples here, of where I’ve used the “Scanner Pro” app.
In traditional hand pulled prints, “proof prints” are made, and the “plate” or “matrix” – whether it’s a linocut, a lithographic stone, an etching plate.. – is adjusted accordingly, to get the final print result the artist wants. Below is a link to a print glossary of traditional (and some more modern) printmaking terms. “International Fine Print Dealers Association” – Print Glossary.
I see the iPad artwork, within whatever art app I’m drawing or painting, as a “pixel plate”.
 A cropped slice of a larger iPad painting.
The proof printing processes are vital in seeing where changes/editing may need to be made, to the my iPad drawing or painting – the “pixel plate”. After looking carefully at the print I make, if needed, adjustments in an art app (using my fingertip, which I prefer, rather than use a stylus) and also in the Photo section on the iPad.
My “proof” prints are also a help as a preview, before I upload my art to my Red Bubble shop. I upload my art image to Red Bubble via my iPad, from the photo section, after I’ve made any necessary edits, and increased the overall pixel measurements – PPI – *more on this in section 3. I order my Red Bubble cards, sometimes a poster… to recheck the quality of the image.
Initially I did a lot of laser printing, by emailing my art images as pdfs to my local “Office Choice” store. Then after picking them up, I could see where I may have to rework them, before resending them again…
At one stage I laser printed a swatch of colours from one of my favourite art apps, “Art Set Pro” as a guide. It didn’t take long to fairly know how my art on the screen would look printed. I rarely use laser printing nowadays; as I find pigment ink on matte paper has the quality and look I prefer. Also a laser printer doesn’t offer the same subtlety in tone and colour range as an inkjet, or accept the various papers I want to use.
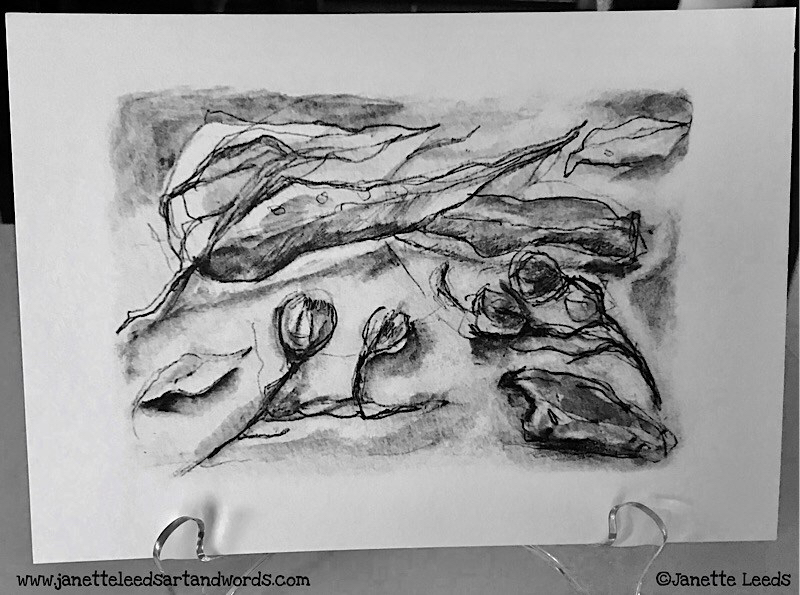 This print of my pencil drawing showed a pleasing range of tones. Will tint a print with watercolour.
Although iPad art is a digital art form, and I’m essentially drawing with pixels, I don’t know anything about computer digital art, or photoshop. I rarely use a computer – for anything. Fortunately for iPad art I don’t need to have any of those skills. Drawing on my iPad feels like I’m just swapping one kind of paper, for another kind of paper!
2/ About Digital/Inkjet (Giclee) Printing – with links about open and limited print editions.
To clarify, an inkjet, laser, or “giclee” print – which is fundamentally an inkjet print – all of these come under the umbrella title of a digital print. *More information here.
I’ve spent some time researching, what in particular is required to make a good quality digital print. I want to offer a good quality home, for my iPad artworks and second home, for any of my art in traditional media I choose to print.
The term “giclee” print is used to indicate a fine art quality print, commonly a “reproductive” print, printed on an inkjet printer, with:
- fade resistant pigment inks;
- with often six, eight or more colours,
- on archival, or similar in quality, acid free paper. *This link here, gives more detail about different qualities of paper – I find anything about paper quite fascinating!
It was a term coined to differentiate these better quality prints, from earlier inkjet prints; which were often a poorer quality: in colour, paper, and inks – usually prone to fading.
I don’t call my prints “giclee”; it has an elitist twang, which I don’t like, and doesn’t really describe the print – it’s not used as often in recent years.
There is a need to clearly describe and define the various types of prints available through these newer print technologies. As the confusion of which, can lead to (though not always deliberately) misinformation about a print: by art dealers and artists, and which I think is sometimes used for financial gain – not an uncommon practice in any field!
This Wikipedia link gives a thorough explanations of the origins and meaning, of the term, “Giclee”.
Briefly – here are some more points about “limited” edition and also “open” edition prints. In digital printing, a high quality, art print can be made available in an unlimited number of prints, these are often referred to as “open” edition prints.
A “limited” edition, is as per the title, a limited print series of an artwork, often a digital “reproduction” print of a work in another medium. But also a structure used for “original” artworks/prints by some photographers, digital artists; and for hand drawn artworks/prints on an iPad. This purposely imposed limitation: perhaps of ten or less, 20 or more, can make them more of a collectable, unique artwork.
Limited edition art prints are: numbered, signed, and often sold with a certificate of authenticity.
An “open” edition digital print, whether a “reproduction” or “original” print”, is usually sold for a lower price than a “limited” edition print.
I lean more towards offering “open” edition prints, and “one of kind” prints – which are those with traditional media applied to the print. As it is, my “open” prints (unless from my Red Bubble shop) which I print myself, are somewhat “limited”, as I’m not likely to do masses of them! I also sign each one.
In a hand pulled print edition, a limited edition is the usual course of things, as the “plate” will eventually wear out.
 A print, of a quick sketch in “Tayasui Sketches 2”, and some paint in the “Art Set Pro” app.
A good point below: unfortunately the page with this quote, is not on their site now, however, this is a link to the Fidelis Art Print website.
“And finally (this really isn’t a tip), your art is not worth more or less because it was printed digitally. Price your pieces fairly and always act with integrity in your business dealings. Ultimately, your art will sell because someone loves it—not how it was printed.” ~ Fidelis Art Prints
These relatively new technologies in digital printing are certainly a cost effective, and an easy way for: digital, traditional and iPad artists, and photographers, to print and sell their “original” digital artwork, and also “reproductions” of any works on paper or canvas.
3/ About the Inkjet Prints I Produce Myself: the Printer, Processes, and Paper.
I do most of my own printing, but at times, I have some of my art printed in various ways: via my Red Bubble shop; from a pdf of an image sent to my local office supply shop (which I use sparingly); and occasionally through other printing services, one of which is an excellent printing company: Code Ice Prints.
When I outsource my art for printing, I keep a close eye on the overall quality of the prints. It was not an uncommon practice over the centuries, for artists to work closely with a professional Printer. I don’t see that it detracts from the intrinsic value of my art print.
Before purchasing an inkjet printer, I considered what makes a good quality art print. Some of which I’ve already mentioned.
- Good image quality: colour, tone, contrast; which of course also has a lot to do with the artwork itself.
- Fade resistant pigment inks – though dye inks are improving all the time. I initially had a dye based printer.
- Archival/acid free paper – the quality of the paper I’ve discovered, can make all the difference to the colour and tonal qualities of the print.
You can find a lot of information on these factors at Wilhelm Imaging Research
I found the Epson Workforce printers, use good quality pigment inks, and when used on the “matte” paper setting makes an excellent colour, or black and white print. The one I use also prints in an A3 size which is a handy option.
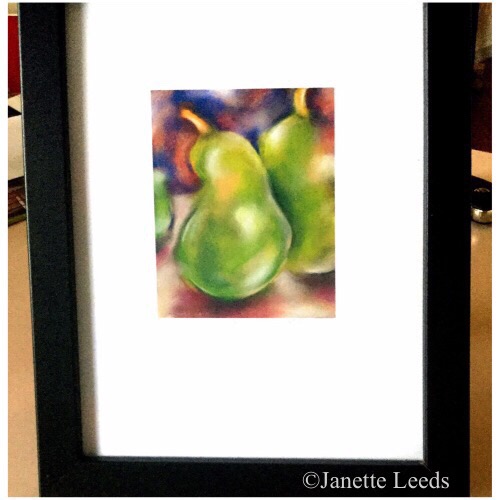 Printed and placed into a simple black frame.
It has four ink colours, as opposed to six or more – however, I’m able to get an excellent quality print, in both colour and contrast. Partly due to the remarkable printhead technologies used in this printer – you can read more about it in a tech review, here… which relates to the DPI part of the topic in the next paragraph.
*A note about PPI (pixels per inch) and DPI (dots per inch).
I happily went along printing my art knowing very little about the PPI and DPI involved in printing processes. I did know enough to take some of this into account when choosing my printer; and was able to produce good clear prints, up to A3 size without any pixellation. However, I quickly went on to learn more, when upon uploading my images to my new Red Bubble shop, I realised the pixel size – the PPI – of my art images, only allowed for printing onto cards, and very small items!
With a search and a prayer I came across an app called “Big Photo”. It enabled me to very simply, increase the pixel sizes of my art images so they could be printed up to about 80cm x 55cm plus – as in the posters I have on Red Bubble. It resamples and increases the overall pixel size, the PPI of an image, without losing any image quality in the print. Here is a helpful quote below from an article (well worth reading) on these matters – here’s a link to the article – on a website called 99designs.com
“ PPI describes the resolution in pixels of a digital image whereas DPI describes the amount of ink dots on a printed image. Though PPI largely refers to screen display, it also affects the print size of your design and thus the quality of the output.”
I find it rather a complex area, kinda interesting, but not essential for me to know it thoroughly! If you want further reading about PPI and DPI and more, this link here, has some detailed information.
I share about”Big Photo” (finding this app was a real blessing!) and other apps I use, on my page, “Some App Information”.
SOME OF THE PAPER I USE
This printer can handle the thickness of a variety (up to 300gsm) of beautiful inkjet – and non ink jet papers.
I use various watercolour papers: Arches, Daler-Rowney, Canson, Fabriano…, and Canson 220gsm drawing paper; and also like the following inkjet papers: Bockingford inkjet watercolour paper, Canson Rag Photographique, Hahnemuhle Photo Rag, Bamboo inkjet paper, Kozo (Mulberry) inkjet paper…. each one, has it’s own particular beauty in how it brings out the colour and tones in an image.
I’m keen to use eco friendly papers, and try to source from companies that have good environmental policies.
Also, to get a successful print, as I’ve mentioned earlier, I make any neccesary colour and tonal adjustments, during the proof printing stages. I do this with: the editing tools in the Photo section on the iPad, and sometimes I’ll need to do further work on the art image (both iPad and traditional) with some art app media, and/or rescanning in a traditional media artwork, after making some changes to it.
Any differences between an image I’ve printed, and the same image printed on a more expensive (outsourced) printer – I looked into this early on in my print learning path – are quite difficult to discern. I’m really pleased with the excellent results.
PAPER SETTINGS
There’s quite a few paper settings on this printer for various sizes, and you can do custom sizes. It also has a wide range of other settings: plain paper, high quality plain paper, semi-gloss and more. *The flatbed scanner and adf port scanner on this printer also does quite a good scan; and some colour/tone… size adjustments are able to be made on the printer itself.
I’ve tried the high quality plain paper setting for prints; however, for a high quality art print, the “Matte” setting gives the best result for the various papers I use (see above).
The lower cost of this printer and the inks, also allows me to feel less precious about adding traditional media to the print – something I often like to experiment with.
Further detail on how I print an iPad or traditional media drawing/painting
I send my art to my Epson printer, via my iPad.
Firstly, I centre an image on a page, in an app called “Pages”, and leave a white border around it before printing it. *There are some handy templates in “Pages”. I use a few for making my Art cards. Occasionally, I print straight from the photo section of my iPad, or from the scanner on the printer itself.
I use the LCD panel on the printer to put in my settings, which for an art print (I use various high quality matte papers, see above) are: Matte paper, borderless, and A4, A5 or whatever size I want.
*Importantly, as I’ve mentioned, the paper you use directly impacts the final outcome of a print. You will need to make adjustments, in particularly to saturation levels (care taken here, because it’s easy to oversaturate an image) according to the paper you use. As always, artist proofs and some editing on the iPad, are necessary to help with these decisions.
I don’t like the quality of the print sent from the “Epson iPrint” app, so I just use it to check the ink levels, and I order ink through there. So far I’m very impressed with how long the inks last – I print regularly, and it’s months before I have to order any.
In a nutshell, the below paragraph describes the prints I produce at home.
I print my iPad art, and make “reproductive” prints of some of my art in traditional media, with high quality, fade resistant inks; onto eco friendly, acid free matte paper, with an inkjet printer. The materials used for this print give it a permanence of approx: 100yrs behind glass, as stated by wilhelm-research.com – Epson DURAbrite ultra ink on Epson matte paper heavy weight paper. And on other papers, without glass, fade resistant up to 51+ years, as per this article: RedRiverPaper Premium Photo Inkjet Papers a series of test to simulate 51+ years of exposure, without glass.
I much agree with the quote a few paragraphs back in section 2/, from “Fidelis Art Prints”.
Some traditional media I like to use on my prints – and on their own as well:
- coloured pencil (Polychromos); Albrecht Dürer watercolour pencils, “Pablo” Caran d’Ache coloured pencils.
- Watercolour (Windsor and Newton, and Sennelier ) – water doesn’t make the pigment ink print run.
- Acrylics and gouache.
- Sometimes I begin a work on canvas or paper, scan it in, add more to it in an art app, then print it – endless……
- As mentioned, I often use (non-inkjet) watercolour paper (and some drawing paper, particularly Canson 220gsm paper) in the printer; both 180gsm and 300gsm – with great results!
- The non-inkjet papers (some are %100 cotton) work not only well for stand alone prints, but are excellent for further work on the print with traditional art media. If I saturate the colour and adjust contrasts, etc – in “Photos” on the iPad – a print looks equivalent in quality to the prints on inkjet paper. Also, I love how the various paper grains show through.
- I enjoy doing a small series of prints of the same image, and varying the way I use traditional media on them. These can be called, a Variable Edition “VE” or Edition Variable “EV”.
- With watercolour and drawing paper, it’s much easier to work on a print, because there’s no inkjet finish to impede the flow of the paint, or the effectiveness of graphite or coloured pencil…
I look for good lightfastness, and archival qualities in whatever art media I use.
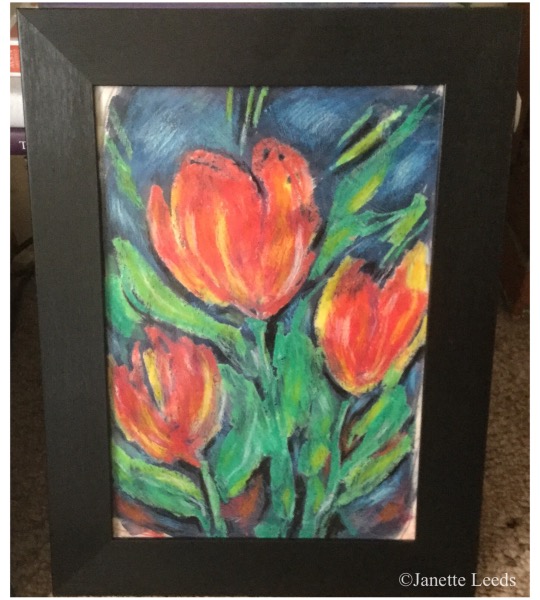
 I printed this scanned in oil pastel; added a bit of oil pastel to the print, then a isolation coat of gloss medium, and a satin varnish finish. Yay, no need for glass on the front.
4/ Art for All.
And finally, a link to this interesting article below, an offer of more “food for thought” – I found it a tantalising and agreeable piece.
Thankful to God†, for all my creative opportunities.
If you have any questions or enquiries, you are welcome to send me a message via my Contact page.
If you’d like to receive my art posts by email you are welcome to subscribe, here.
Thanks for visiting!
All images and text © 2014 -2025 Janette Leeds.
Disclaimer
The various apps and products I share about, as well as any links listed, are to offer you information – which I hope you’d find helpful, and explore further. I’m not affiliated in any monetary way (would make it clear if this was the case) with the product developers or companies, nor do I neccessarily endorse all their products or practices – just saying.
Back to Top


Thanks for sharing all your hard work with us all. It’s a journey, and although I espouse the direct contact – one-off – aspect of pen brush etc to paper we should not be closed to any form of expression (been in printing as typesetter for 35 years) – have done photoshop but might get round to iPad yet, as its just another ‘ground’ – 😊- u might like to read an old blog of mine = Cerebral Fingertip Conduiting. – anyway – nice to make your acquaintance – keep up the excellent work – and experimentation. Have a good day KR
LikeLiked by 1 person
Thank you Ken, for stopping by to comment, and your kind words. I love what you do with your paint brush! My brushes are looking a little lonely – about due to have a dab about with them. It is fun, to paint or draw on just about any surface, or as you call it “ground”.
Hope you get to do some art on an iPad, good fun. Such a high tech device, but drawing and painting on it, somehow manages to have quite a natural “feel”. Of course using good quality art app media, makes all the difference.
Really enjoyed visiting your blog; so many interesting and thoughtful posts. Look forward to seeing more of them. Hope you have a good day too ~ Janette, God Bless
LikeLiked by 1 person
Thanks Janette – send the cheque in the post for the iPad – joking! joking! 😊
LikeLiked by 1 person
Thanks for all the info. I’m considering jumping into printing my iPad paintings from home soon and appreciate the insights here. Appreciate the feedback about longevity too.
LikeLiked by 1 person
Hi, Fred, glad to be of help. Thanks for the feedback. 🙂 I did sneak, “went” actually 🙂 over to your facebook page, and saw a little of your work – looks great! Hope you do get to print some up – it’s good fun. If you have an website, or an online portfolio, perhaps, you could put the link in the comment section here. It’d be great to see more of your work.
Here’s a link to the “Mobile Art Academy” thought you’d enjoy seeing some other work by artists using iPads/iPhones, and android tablets… “ArtRage”, “Procreate” and others… sponsor their yearly “Mobile Digital Art and Creativity Summit”. All the best, with your future iPad art adventures. ~ Janette 🙂
LikeLike
Schön. Gut gemacht. Freundliche Grüße, Wolfgang
LikeLiked by 1 person
Danke! Ich kann German ein bisschen. Also used an online Übersetzungswörterbuch. 🙂 Guten Tag, Wolfgang!
LikeLike
Interesting stuff Janette! Thanks for sharing your experience. I had some of my iPad art printed, and I was nearly always very pleased with the result. It is important that you check and judge the prints yourself, to be sure of the right colour and quality. For me, the most difficult part of the process to a work of art is the last part: presentation. How do you frame your print? It just makes all the difference. I prefer to look at the print with a protection layer that doesn’t show, in a solid frame without glass in front of it. The result is astonishing, but expensive. In the end fine art printing is not really cheaper.
LikeLiked by 1 person
Thank you Rob for your comment!
I learnt lots doing the research for this page; and hope it’s a help to others. I agree, fine art printing isn’t cheap, and with the price of framing it can all get out of hand! I think the prints I make are fine art enough for me 🙂 and far more economical to make – which also frees me up to “play” more with the print. And I thoroughly enjoy all the processes. However, presentation though important, is not something I excel in… I’m most likely to just tack up a work unframed (traditional or iPad) or put it aside somewhere, and get on with the next one. I’ve not often exhibited my art, or had it for sale, though I may look into this more in the near future. However, I’m keen to keep the cost down, and I quite like the look of a simple (usually black) frame… no matt board, a white boundary showing around the print, or on a watercolour etc.. though pity it will need to have glass. 🙂 I know about the conservation aspects of framing, but I think perhaps the purchaser could look into that. Also, I’ll sometimes use a frame, with gloss gel medium on the print (and with care it can also be used over a gouache or watercolour painting) with a brush of satin varnish for the finish. The “protection” layer sounds great..though not sure what it is?
I also have some A4 and A5 clear archival sleeves, which I can slip prints into, with cardboard backing for extra protection…plan to use them for online selling and/or in shops in my local area. On my “Shop Info” page I mention about plans for selling prints I make online, and about my RedBubble shop – which though not ideal for online selling, it has it’s good points. Well, I’ve just about written a blog post! I may mention more of all these areas on my blog…but don’t seem get time to write long posts these days. I really love your art Rob, and look forward to your future posts. All the best, Janette
LikeLike
Hi Janet, Thanks for your reply. Indeed, I hadn’t noticed it yet. I like your experimenting attitude. In the future I might consider to buy my own printer to do just that. I have had one ten years ago in the pre-iPad age and used photoshopped images in combination with painting. At the moment I live a nomadic live, which makes it too complicated to have my own super printer. But the chances are that I will move back to my home country next year. We will see.
About the protection layer: I know you can buy Sennelier HC 10 universal fixative or Hahnemühle Protective Spray (which seems to be the same as Talens Protective Spray 680). I just bumped into a framer who had developed his own spray and do it for me in a professional way. When you spray it yourself is not easy to spread it evenly on a larger surface. I really like your blog. Very interesting. Rob
LikeLiked by 1 person
Hi Rob, that spray sounds interesting… thanks for the info.. It’s great to meet up with another artist adventuring in the world of iPad art. I really enjoy your work – you have so much skill and talent! Look forward to seeing your future posts. 🙂 Cheerio ~ Janette
LikeLike
Thanks. Lots of good and helpful info here!😊
LikeLiked by 1 person
Thanks Mary! So glad you find it helpful. Enjoy your day! ~ Janette 🙂
LikeLike